At first I was a little confused about the concept of Active/Active and Active/Passive and its relationship with SQL failover clustering. In a multi failover cluster instances, these terms can be seen as ambiguous when used to describe the configuration of the SQL Server instances and the nodes they are running on. This term can give the misleading impression that some load balancing is occurring across nodes or across SQL Server instances ![]() .
.
Active/Passive Cluster: In an Active/Passive scenario, all SQL instances are owned by only one node irrespective of the number of nodes present in a SQL cluster. In the event of a failover, ownership would be transferred to the next preferred node.
Active/Active Cluster: In an Active/Active scenario, all SQL instances are owned by individual participating cluster nodes respectively. In a two instance setup, instance1 will be owned by node1 while instance2 would be owned by node2. Note you can’t share a single network instance and its disks with two named instances, with the current version of SQL.
Requirement:
- A second Network Name/Named Instance with IP address (SYS02SQLINS01/INST02, 172.16.2.8)
- Port number (1435)
- SQL service account different from one used with first instance
- Additional disks for Database and Log files (Refer to my previous post in Part1 on how to add virtual disks)
Note: Enure that the new virtual disks for Data/Log had been formatted using 64K blocksize and added as Available Storage using Failover Cluster Manager.
Setup Guide
1. Node1
- Insert the SQL installation disk -> Double-click Setup.exe -> Wait for the SQL application to load
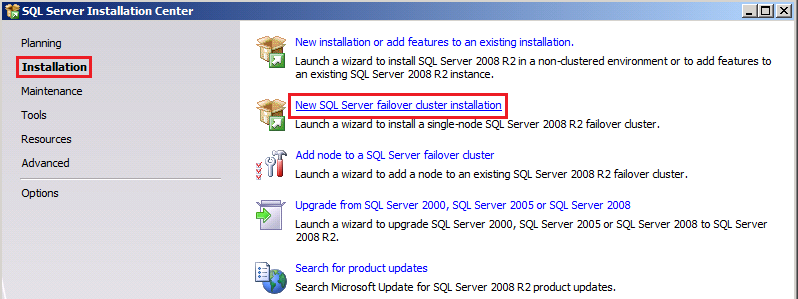
- On SQL Server Installation Center page -> click Installation -> click New SQL Server failover cluster installation
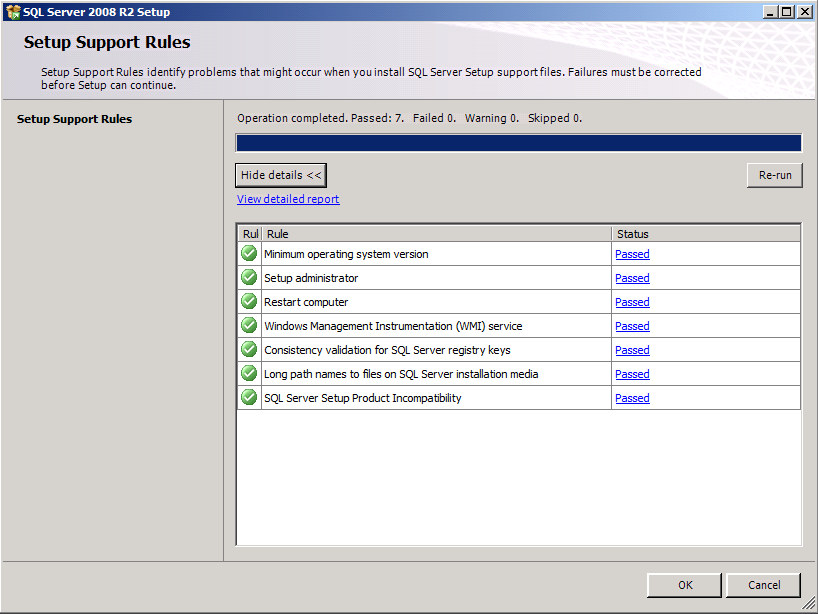
- On Setup Support Rules page -> click Show details -> Ensure the status column shows Passed for all rules -> click OK
- On Setup Support Files page -> click Install and wait for the setup rules to identify any problem
- Click Next
Note: You can ignore the Network Binding Order warning, this appears to be a bug
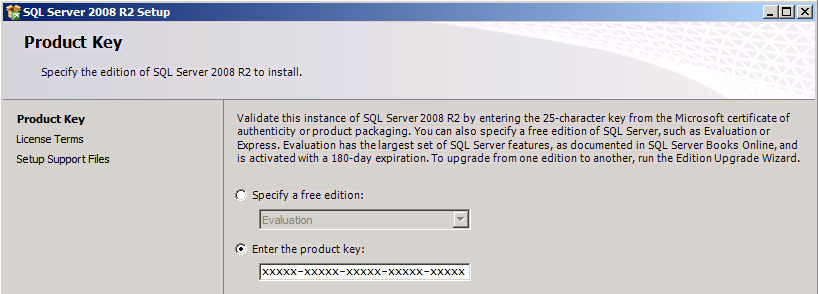
- On Product Key page -> Enter the product key or select Evaluation -> click Next
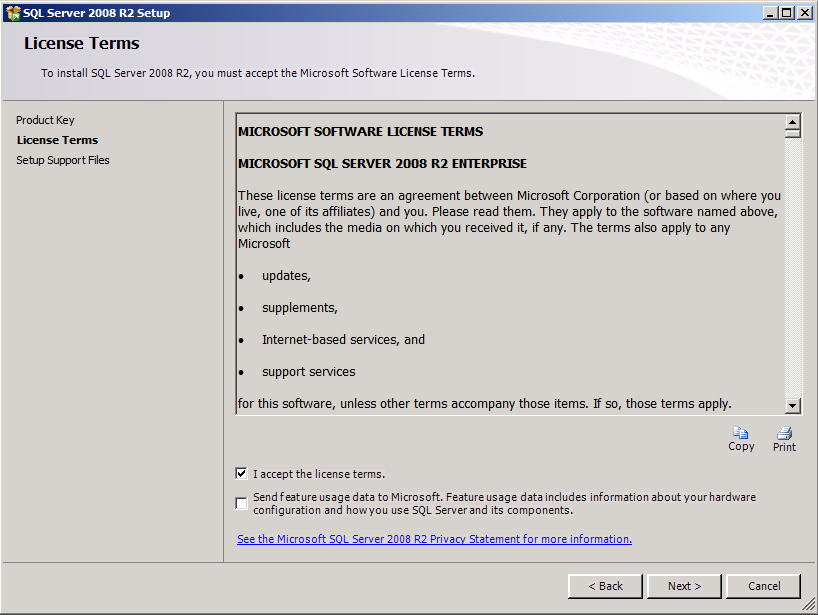
- Accept the license terms -> click Next
- On Feature Selection -> Select Database Engine Services; Analysis Services and Reporting Services (Note the shared services are greyed out because they are not instance aware and can only be installed once in a multi instance setup) -> click Next
- On Instance Configuration Page -> Enter the second Network Name/Named Instance -> click Next
- On Disk Space Requirement -> click Next
- On Cluster Resource Group -> Accept default -> click Next
- On Cluster Disk Selection -> Select the two new virtual disks -> click Next
- On Cluster Network Configuration page -> Deselect DHCP -> Enter IP address assigned for this instance -> click Next
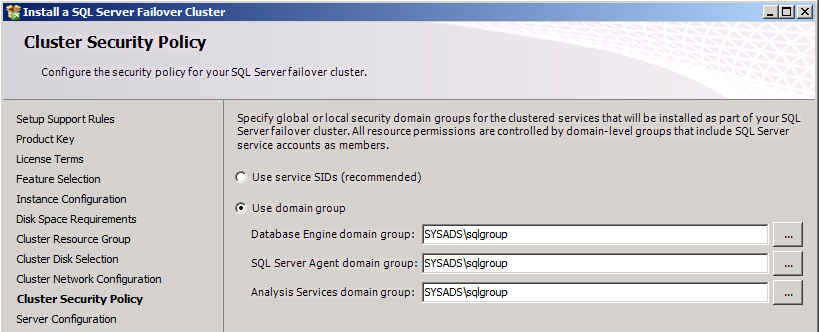
- On Cluster Security Policy page -> Select ‘Use domain group’ -> Enter the SQL group account used in first instance -> click Next
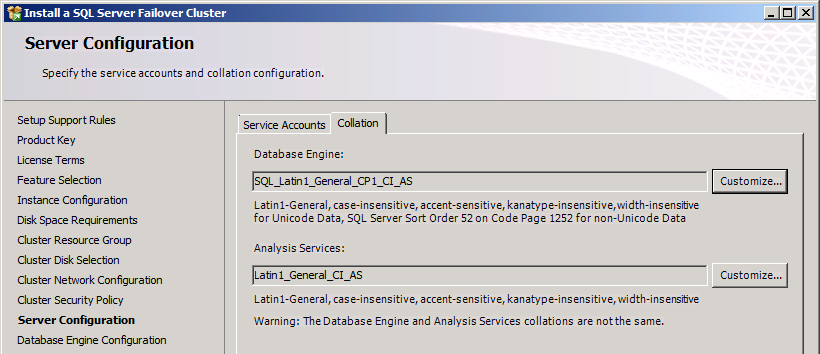
- On Server Configuration page -> Click Use the same account for all SQL Server services -> Enter the SQL service account created and password -> click OK
- Click Collation tab -> Select your collation depending on your region -> click Next
- On Database Engine Configuration page -> Select either Windows authentication mode or Mixed mode -> Add the relevant accounts
- Select Data Directories Tab -> Enter Data/Log/Temp/Backup location depending on your choice
- Select FILESTREAM Tab if you want to enable it -> click Next
- On Analysis Services Configuration page -> Add required accounts
- Click Data Directories -> Make the needed directory changes -> click Next
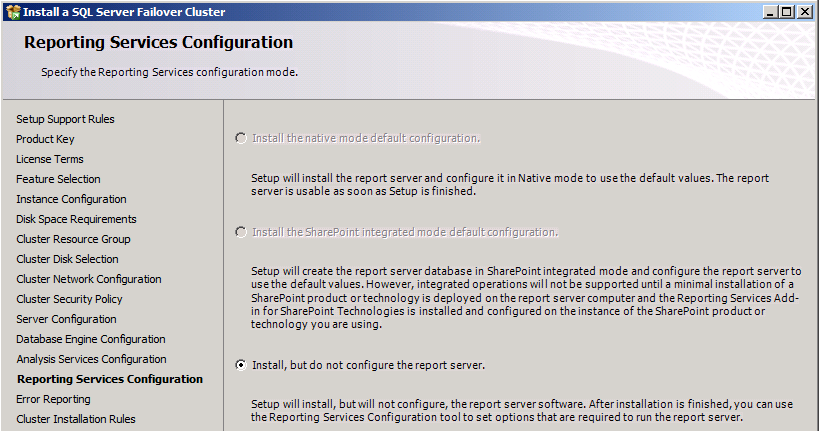
- On Reporting Services Configuration page -> Select Install, but do not configure the report server -> click Next
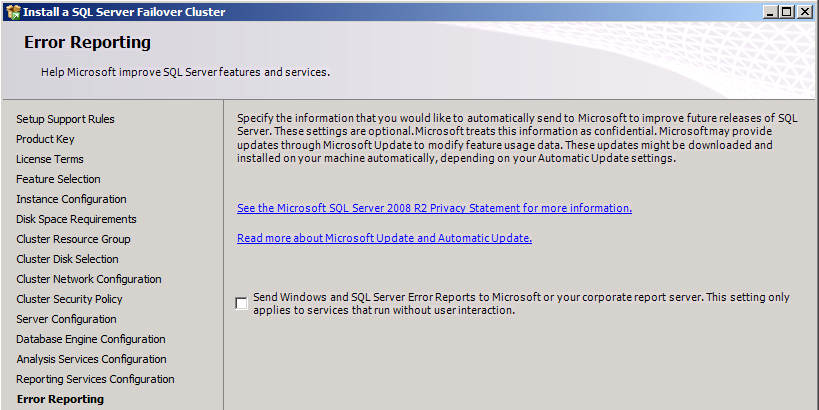
- On Error Reporting page -> Tick the box if you want to send error reports to Microsoft -> click Next
- On Cluster Installation Rules page -> Ensure that there are no failed rules -> click Next
- On Ready to Install page -> Review your settings -> click Install
- Click Close after installation is completed.
2. Node2
- Insert the SQL installation disk -> Double-click Setup.exe -> Wait for the SQL application to load
- On SQL Server Installation Center page -> click Installation -> click Add node to a SQL server failover cluster
- On Setup Support Rules page -> click Show details -> Ensure the status column shows Passed for all rules -> click OK
- On Setup Support Files page -> click Install
- On Setup Support Rules page -> click Show details -> Ensure there are no failed rules -> click OK
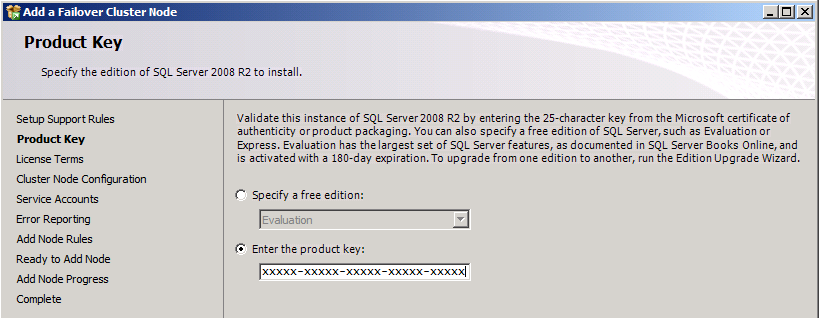
- On Product Key page -> Enter the product key or select Evaluation -> click Next
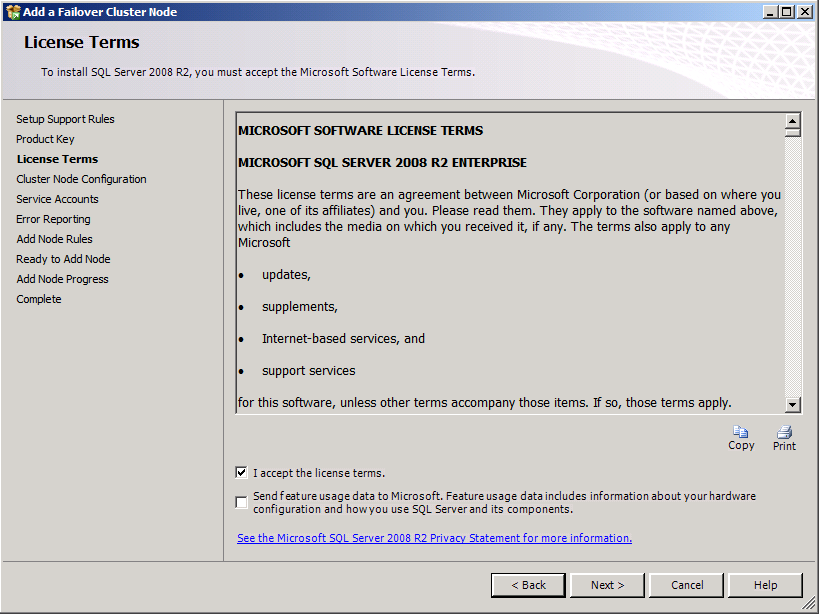
- Accept the license terms -> click Next
- On Cluster Node Configuration -> Leave default (Note the new Instance only has one SQL node) -> click Next
- On Service Account page -> Enter password for SQL service account -> click Next
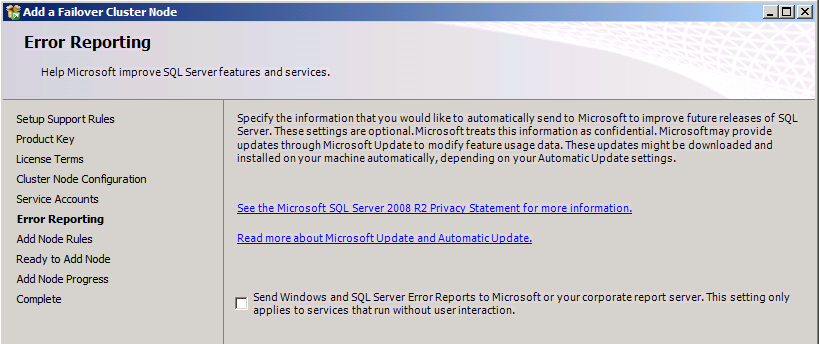
- On Error Reporting page -> Tick the box if you want to send error reports to Microsoft -> click Next
- On Add Node Rules page -> Ensure that there are no failed rules -> click Next
- On Ready to Add Node page -> Review your settings -> click Install
- Click Close after installation is completed
Post Configuration:
Remember in previous post when we installed the first SQL instance, we latter upgraded the instance to SQL SP1. The newly installed instance will not be automatically upgraded to SP1. To verify this:
- Open Microsoft SQL Server Management Studio -> On connect to server screen -> Enter the second instance server name
- Click New Query -> Type this command ‘select @@version‘ -> click Execute -> Take note of the version “10.50.1600.1″. Click here to view the different SQL version number and the corresponding service pack. So the version number for SP1 is 10.50.2500. To upgrade the new instance to SP1, follow the steps outlined in previous post (Click here). Note accept default settings this time and follow the on-screen instruction.
- After the upgrade, this would change the version number to 10.50.2500

